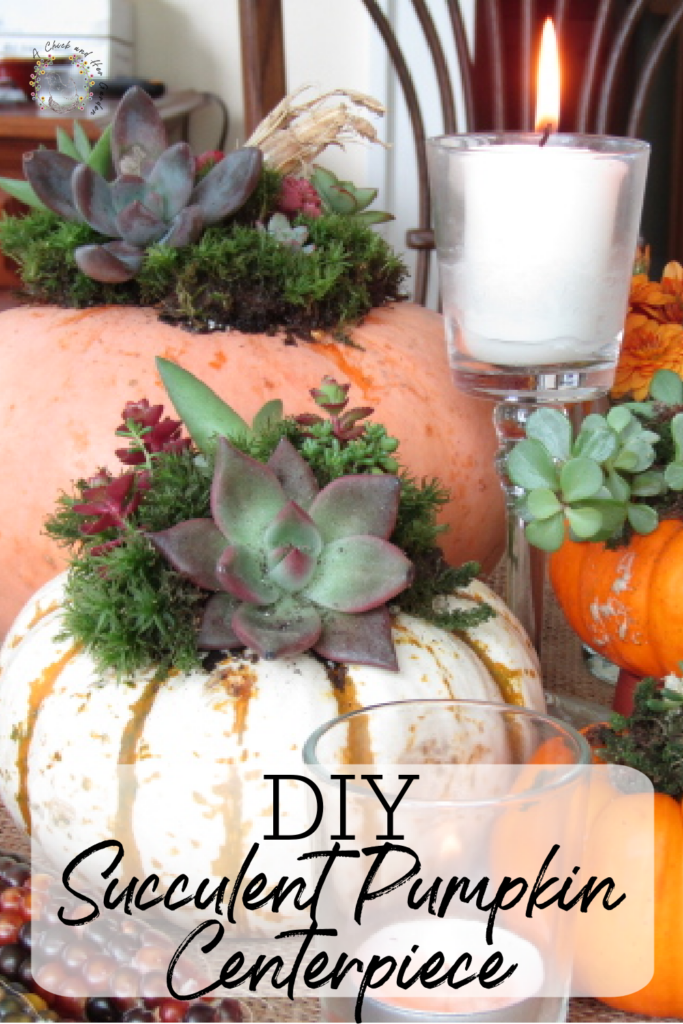
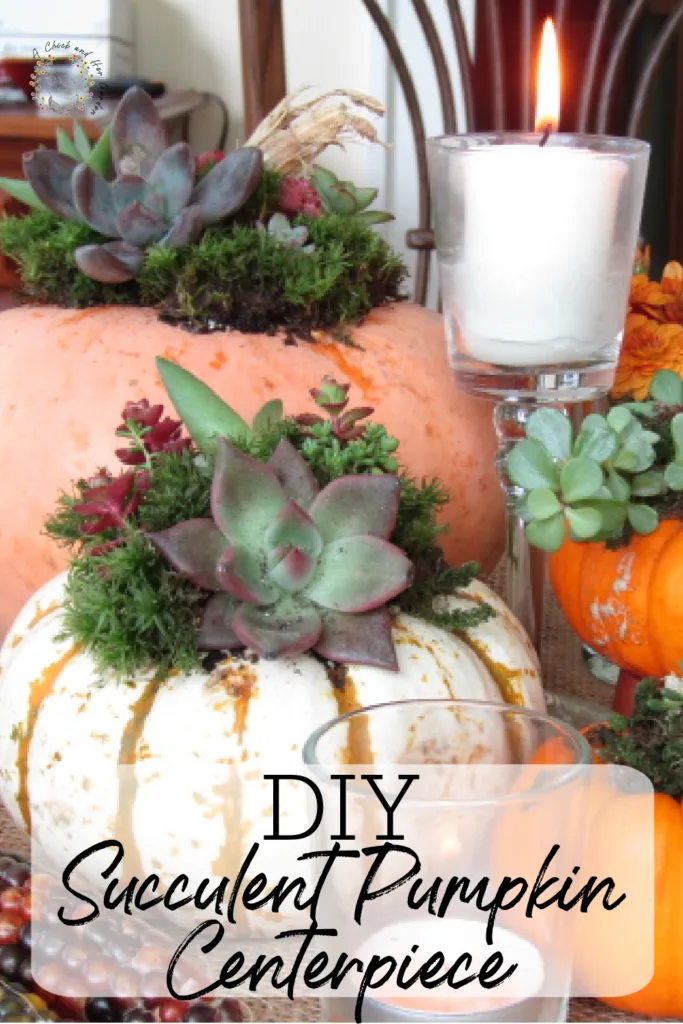
DIY Succulent Pumpkins
How much do you love those succulent pumpkins that you see around the holidays??
If you’ve read my most recent post, What Are Succulents and How Do You Grow Them?, you might have guessed my new garden obsession!
I’ve always been a crafty person, learning how to knit when I was 10, and succulents give you the best of both worlds, gardening and crafting!

This page may contain affiliate links. I may earn a small commission when you make a purchase, but it does not effect your cost. Thank you so much for your support of A Chick And Her Garden! ~ Staci
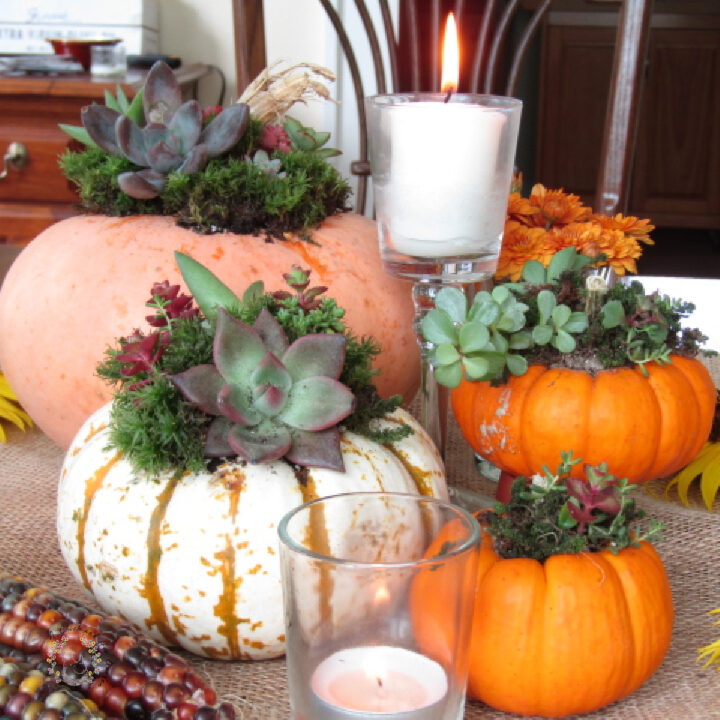
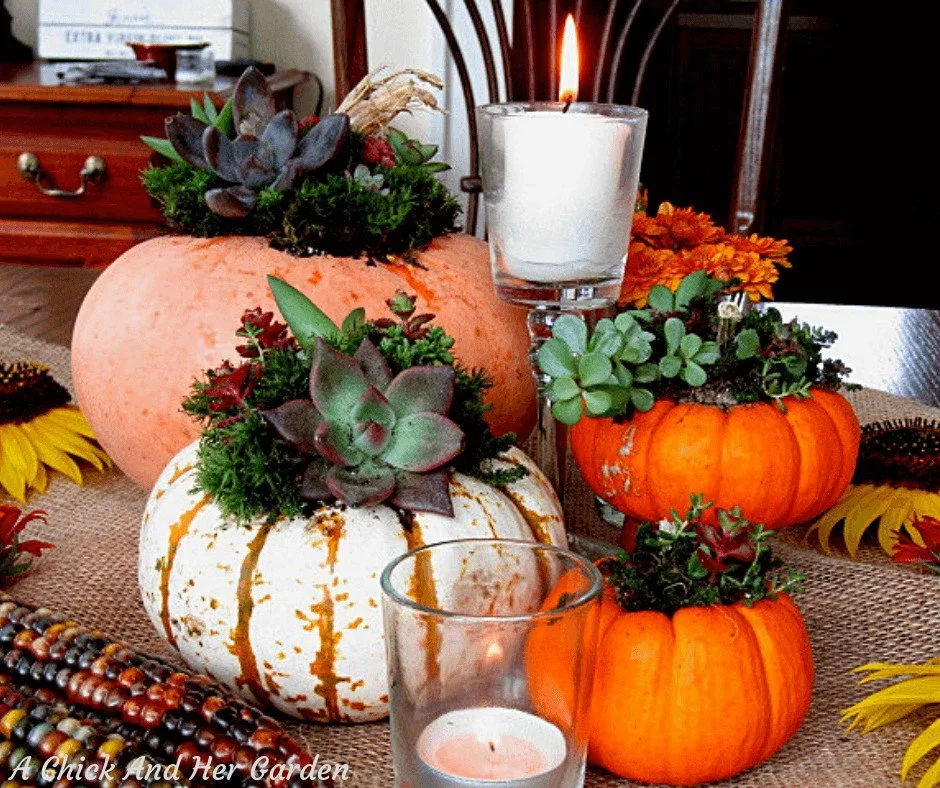
With Fall coming up quick Succulent Pumpkins were perfect for my next project!
After my purchase of succulent plugs from Mountain Crest Gardens, I was hooked! And now I have succulents tucked all over my house!
I’m pretty sure Nick is doing a really good job at biting his tongue, because I’m only hearing a comment or two here and there!
It only seemed natural that I need to add them into my fall decor as well! Succulents come in so many colors, shapes and sizes that it was easy to incorporate them.
Personally I am a fan of rich colors like deep greens, purples and reds. But you can also use pastels in blues, purples, greens and pinks!
Share the love! Pin me for others!
What do you need to make succulent pumpkins…
- Assorted pumpkins
- Moss or succulent soil
- Assorted succulent plugs or cuttings
- Succulent transplant tools (optional)
How to make succulent pumpkins…
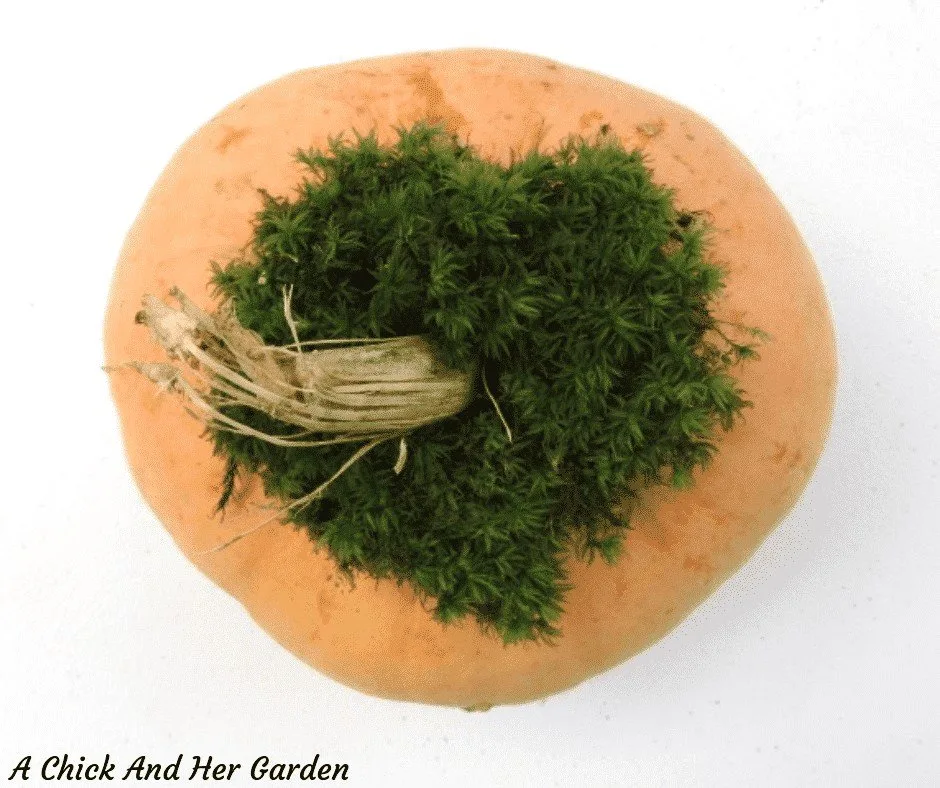
…is actually extremely simple. Before I started I assumed that you cut into the top of the pumpkin. And how is that pumpkin supposed to last if you cut into it? Well, you know what they say about assumptions…
This probably has to be the best way to decorate pumpkins for the holidays! One, they’re prettier. Two, no mess!
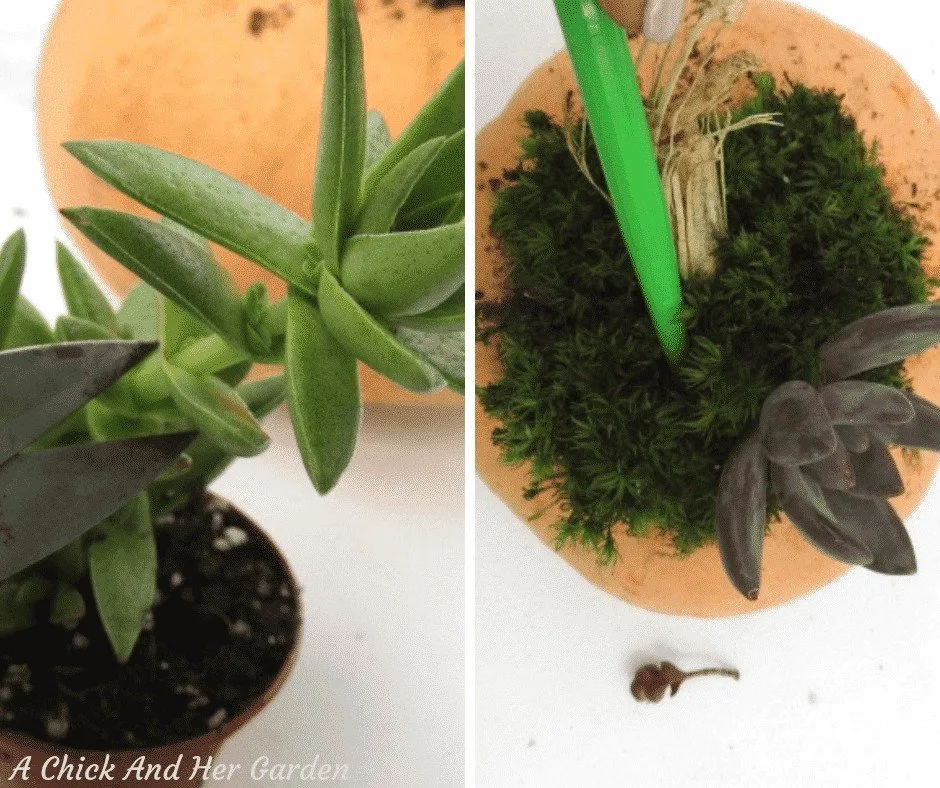
To get started all you have to do is place some soil or moss around the stem of the pumpkin. This is where your succulents will root.

Next, you’ll add your succulents. You can either use plugs like the ones I ordered from Mountain Crest Gardens, or take cuttings from larger succulents that you already have.
This is where that succulent tool kit comes in handy!
If you are taking cuttings, use your clean succulent scissors to remove a cutting from an existing plant. Use either a chopstick or the tool in your kit to poke a hole into the soil/moss. Insert the stem or root ball into that hole.

Continue this process until you have the look you are going for, alternating colors and textures throughout the moss or soil.

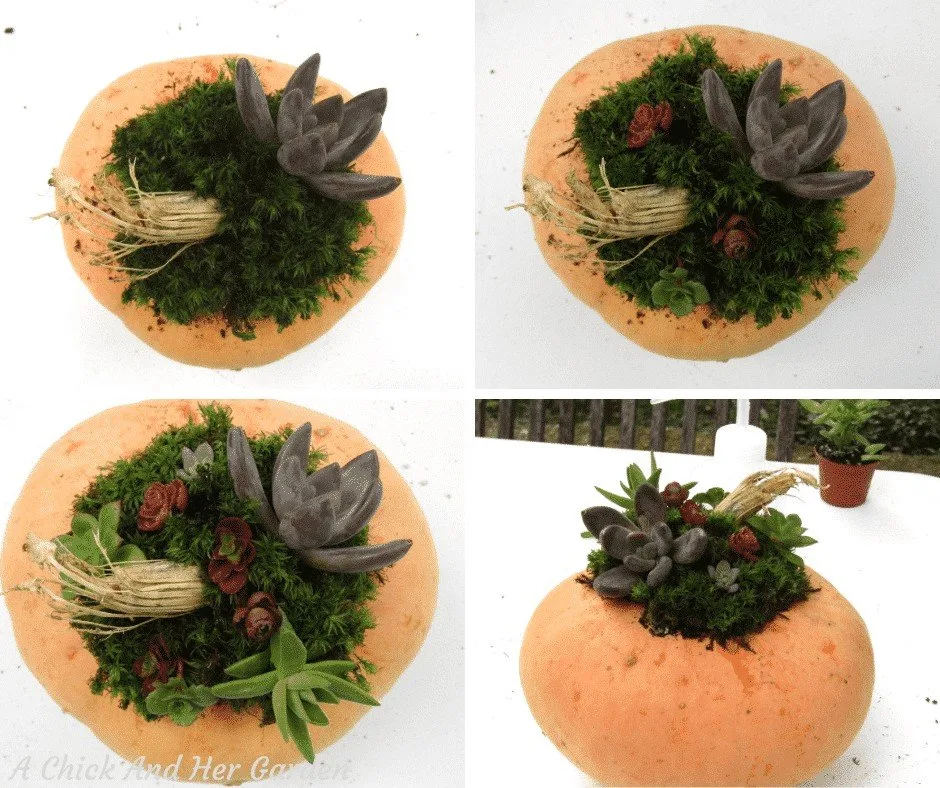
In my succulent pumpkins I used some echeveria, a few types of crassula, and some hardy sedum that I had growing in an old chicken waterer outside! This one is being used as decor in the house.

If you wanted to make these pumpkins cold hardy to put outside, you could use sempervivum (hen and chicks) and hardy sedum! Mountain Crest Gardens has this great assorted tray full of cold hardy succulents!
Sooooo… Fall is over and it’s on to Christmas. What do you do with them now?? Do not, I repeat, DO NOT toss them! By this point your succulents should have more than likely developed a nice set of roots and are perfectly ready to be transplanted!
You can either put them in some hanging baskets or other pots, near a window. Or, stay tuned for some winter succulent ideas!
Related Posts:
Rustic Succulent Planter Centerpiece