How I Finally Figured Out My Sourdough Starter
I love bread. It’s a fault of mine.
I watch people order burgers with no bun and make pizzas with cauliflower. Even though I realize that this is for health reasons, bread is just not something that I am willing to give up. Especially sourdough bread!
Sourdough Bread has to be my favorite! So recently I started looking up how to make my own starter. I read a few posts about it and thought it seemed fairly simple, so I gave it a shot.
People tell me that I have a lot of patience because I work with young children. Well, I guess I use it all up on them, Nick, and my dogs because I did not have it when it came to waiting on my starter!
One of the recipes that I read stated that it would be ready in four to five days. OK, I can handle that. So at day four I tested it. The starter was not ready.
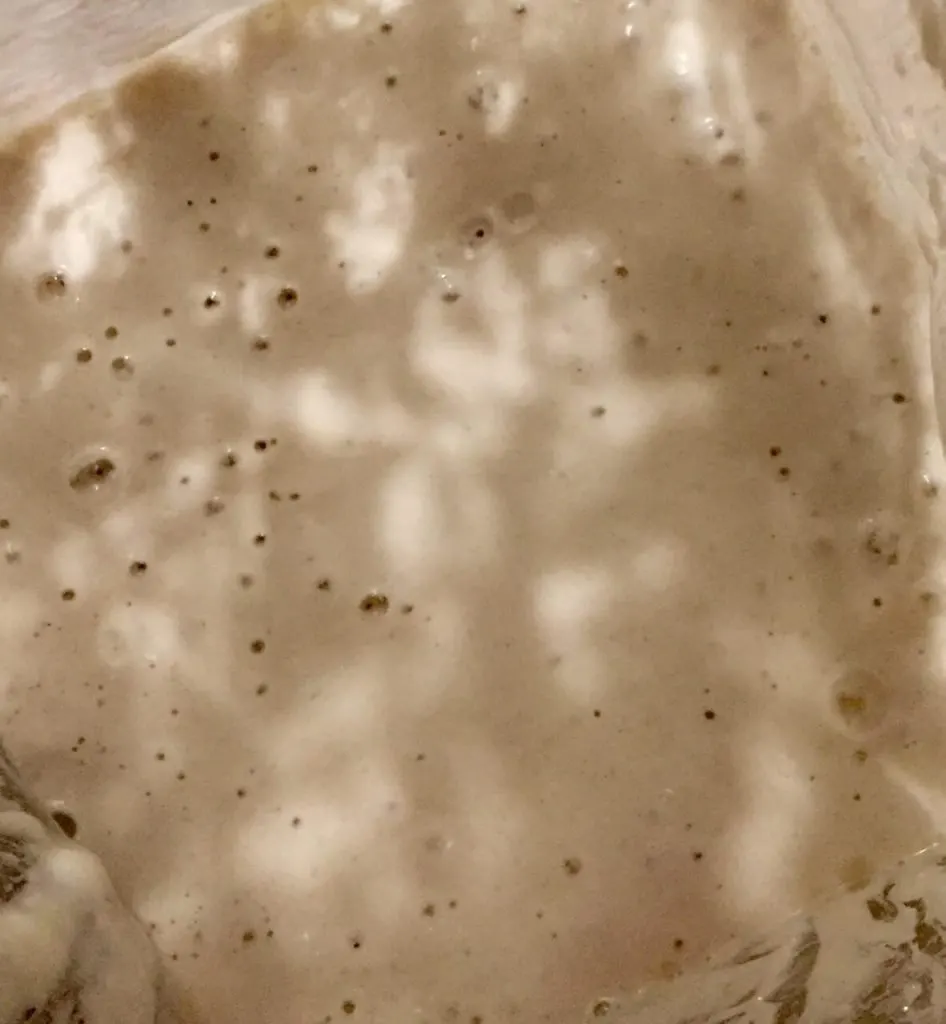
Fine, day five, not ready and looked worse than day four! I was ready to chuck it but decided to fiddle with it and gave it one more day. Success! It was frothy and had the perfect sweet/sour smell.
Time to make bread right? That’s what they said. “Now try our recipe for sourdough bread!” I tried, it failed. Found another recipe. It failed.
So I searched around and found in the comments of one of the recipes that sourdough starter is not ready for bread making for at least a month! The yeast is not strong enough at this point to raise bread, but it is ready for things like pretzels and english muffins.
How To Get Your Starter Started
After playing around a bit, I finally figured it out. It’s a fairly simple process, you just need what I had been lacking. Patience, along with equal parts (by weight, so you’ll probably need one of these) flour and water and a glass or plastic container.
For mine I used a one quart mason jar, and plan to upgrade the next time I get to the store. Start with 150 grams flour (I used occidental flour) and 150 grams of water.
Pin Me For Later!!
On Day 1…
Add your equal parts flour and water to the mason jar and stir it. Cover with some cheese cloth and your canning ring. Throughout the day stir it a few more times.
Day 2…
Your little yeast buddies need fed! You should see some bubbles on the top from the natural yeast. Get out a knew mason jar. Add 100 grams of sourdough starter. Then, add 100 grams flour, and 100 grams of water and stir. Stir it again a few more times again during the day.
Day 3, 4, 5… Until Ready
Repeat the same process. If you start to run out of room just dump some off, it will continue to grow.
To find out if your starter is all set, drop a spoonful into lukewarm water. If it sinks, you are going to have to keep waiting. If it floats, you’re all set for Sourdough Pretzels, English Muffins, and Sourdough Pizza Bombs!
It should look like this when it’s ready…
To Care For Your Starter After This…
You have two options. Store it at room temperature and feed it daily (sometimes twice if the weather is warm. Or you can store it in the refrigerator and feed it once a week.
My starter is past the initial part so tomorrow I’ll be making english muffins. Hopefully this will hold me off until I’m ready to make my bread!
What are some baking skills that you have had to try and try to get just right? Share in the comments!
Shared on:
Our Simple Homestead Hop


Sandy
Tuesday 21st of January 2020
I want to make sour dough pretzels! I need a recipe?
Bonnie Zurcher
Friday 27th of December 2019
What/how do you feed it.?
Wanda
Sunday 4th of February 2018
Help! I’ve been working on my starter for 6 days and it is bubbly and smells good but it doesn’t float and it doesn’t expand. Is it suppose to expand in the jar? I’ve been feeding it twice a day. I’m just not sure if it’s working right.
Homesteader Blog Hop #29 - Back 2 Simple Life
Tuesday 13th of December 2016
[…] SOURDOUGH STARTER ~ FAILURE TO SUCCESS […]
Delci
Saturday 3rd of December 2016
It always amazed me that yummy sour dough is just water and flour! Yum!